Battlestar Galactica: Season Zero 6
| |||||


| ||
| Season Zero 6 An issue of the Dynamite series. | ||
|---|---|---|
| Issue No. | 6 | |
| Writer(s) | Brandon Jerwa | |
| Illustrator(s) | {{{illustrator}}} | |
| Penciller(s) | Jackson Herbert | |
| Inker(s) | ||
| Colorist(s) | inLight Studio | |
| Letterer(s) | ||
| Editor(s) | ||
| Collection Design | {{{designer}}} | |
| Cover Artist(s) | Stjepan Sejic, Adriano Batista, Jackson Herbert | |
| Adaptation of | ||
| Published | December 2007 | |
| Collects | ||
| Collected in | ||
| Reprints | ||
| Reprinted as | ||
| Pages | {{{pages}}} | |
| ISBN | [[Special:Booksources/|]] | |
| Population | 0 Survivors | |
| Special | {{{special}}} | |
| Chronology | ||
| Previous | Next | |
| Battlestar Galactica: Season Zero 5 | Season Zero 6 | Battlestar Galactica: Season Zero 7 |
| Purchase | ||
| Available at BOOKSAMILLION.COM - Purchase | ||
| Available at Amazon.com – [[amazon:{{{amazon}}}|Purchase]] | ||
| Available at Amazon.co.uk – Purchase | ||
| Available at Things From Another World - Purchase | ||
Plot[edit]
William Adama takes back his ship from Agent Levin, only to face a battle with his former friend and commander, Julian DiMarco, who is on a mad quest for vengeance against the Colonial government.
Summary[edit]
- Flanked by Marines, Commander Adama forcibly removes Agent Levin from the CIC, despite Levin's protestations. After this, Adama thanks Lieutenant Gaeta for his help in freeing both himself and Colonel Tigh.
- After receiving permission to speak freely, Dualla tells Tigh of her surprise at the fact that he didn't shove a boot to Levin's ass. Tigh replies that he's saving his boots for Kara Thrace and Karl Agathon.
- On the Sagittaron moon, Thrace and Agathon attempt a lift off in their Raptor, only to be shot down some miles away from the rebel base. Before their pursuers can reach them, Thrace removes the radios from the Raptor and activates a bomb onboard the craft, and both leave the ship. When their pursuers begin to storm the Raptor, hoping to kill Agathon and Thrace, their leader finds that there's a bomb set aboard the ship. They manage to get to a safe distance before the bomb explodes, and their leader runs back to the base.
- The leader reports to Julian DiMarco, who is cradling the body of his wife, Sil. Christa Nolan tells Darja Purat that DiMarco needs to understand that her killing of Sil was necessary. DiMarco asks for the leader's sidearm.
- Hearing the leader's report, Darja Purat says that he's not going to stick around and watch DiMarco's rebellion fall apart. After executing Nolan and Purat, DiMarco accepts their resignation. After giving back the sidearm, DiMarco orders the soldier to gather the troops and establish a perimeter around the complex. He then declares that it is time to bring the fight to the enemy.
- Adama leads a team of Raptors to the surface, despite Tigh's concerns about Adama leading the team personally. As the Raptors jump above the moon's ground, the rebels below fire on the Raptors. One of the rebels, carrying a hand-held missile launcher, is about to take down a Raptor, but is thwarted by Thrace who kills him with her sniper rifle.
- Much to DiMarco's chagrin, the Marines surround the rebel compound. Meanwhile, Adama's Raptor lands, meeting with Thrace and Agathon. Much to his horror, they inform Adama that DiMarco is behind the rebel movement.
- A strike team clears out rooms through the base, ending up at the control room where they discover DiMarco's escape route, itself leading to the hangar bay. Adama orders them to tell him how to get there, adding that he wants the rebel leader taken alive.
- DiMarco finds that their escape ship has been prepped. He orders that their payload be double-checked.
- Adama, Thrace, and Agathon near the bay; Thrace and Agathon reiterate Adama's order to hang back.
- DiMarco orders his men to cover the ship until the landing gear is up, then to board. As he does so, Adama and his duo arrive. Adama offers DiMarco a chance to walk away, but DiMarco refuses and the rebels open fire on the trio.
- DiMarco makes it on board, with Adama right behind him. As they lift off, Thrace is held back by Agathon, since it is too late to pursue.
- As they lift off, Adama and DiMarco fight; Adama fails to convince DiMarco to surrender.
- Agathon radios the Raptors, telling them not to engage the escaping ship, as Adama is on board.
- As they continue the brawl, DiMarco tells Adama that the Fleet sent a kill squad to his planet, killing a majority of his crew. He also claims that they poisoned his mind with a relationship that wasn't real. Adama snidely replies that DiMarco's reaction is typical; DiMarco replies using an extinguisher across Adama's back.
- DiMarco dons a flight suit and enters the Viper Mark II in the port bay of the carrier, telling Adama that "someone needs to be held accountable" for everything that's happened.
- The carrier jumps out of the atmosphere and in orbit near Galactica. The pilot of the carrier notes this over the wireless (as Adama comes in behind him with a large monkey wrench), but DiMarco doesn't care. Adama stops the automatic launch of DiMarco's Viper, telling DiMarco on the wireless that he knows the payload DiMarco's Viper is carrying and that he has nowhere to go. However, DiMarco has a manual release, which allows his craft to launch.
- Adama enters the second Viper on the ship, as DiMarco reveals that his target is the Colonial Military Complex on Sagittaron.
Alternate Covers[edit]
-

Adriano Batista cover.
-
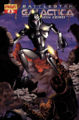
Jackson Herbert cover.
-
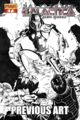
Jackson Herbert's pencilled cover.
-
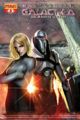
Stjepan Sejic cover.
-
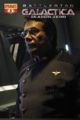
Photo cover.


External links[edit]
- Battlestar Galactica: Season Zero 6 - Regular Edition
- Battlestar Galactica: Season Zero 6 - Foil Edition
| Dynamite Entertainment's Comics Based on the Re-imagined Series | ||
|
Battlestar Galactica 0 |
Battlestar Galactica 1 |
Battlestar Galactica 2 |
Battlestar Galactica 3 |
Battlestar Galactica 4 |
Battlestar Galactica 5 | | ||
| Dynamite Entertainment's Battlestar Galactica: Cylon War | ||
| Dynamite Entertainment's Battlestar Galactica: Origins | ||
|
Issue 1 | Issue 2 | Issue 3 | Issue 4 | Issue 5 | Issue 6 | Issue 7 | ||
| Dynamite Entertainment's Battlestar Galactica: Season Zero | ||
|
Issue 1 | Issue 2 | Issue 3 | Issue 4 | Issue 5 | Issue 6 | Issue 7 | Issue 8 | Issue 9 | Issue 10 | Issue 11 | Issue 12 | ||
| Dynamite Entertainment's Battlestar Galactica: Zarek | ||
| Dynamite Entertainment's Battlestar Galactica: Twilight Command | ||